All of the documents for the LiM project are kept in GitHub, which
is a version control software system (much like Google Drive). This
means is that every version of a file is archived; at any point, we
can "roll back" the repository if we need to for whatever
reason.
Editing in oXygen
All work on the TEI documents should be done in oXygen. It is an
incredibly powerful and useful tool for editing XML and there are a
number of custom features and tools that will editing easier and
more efficient.
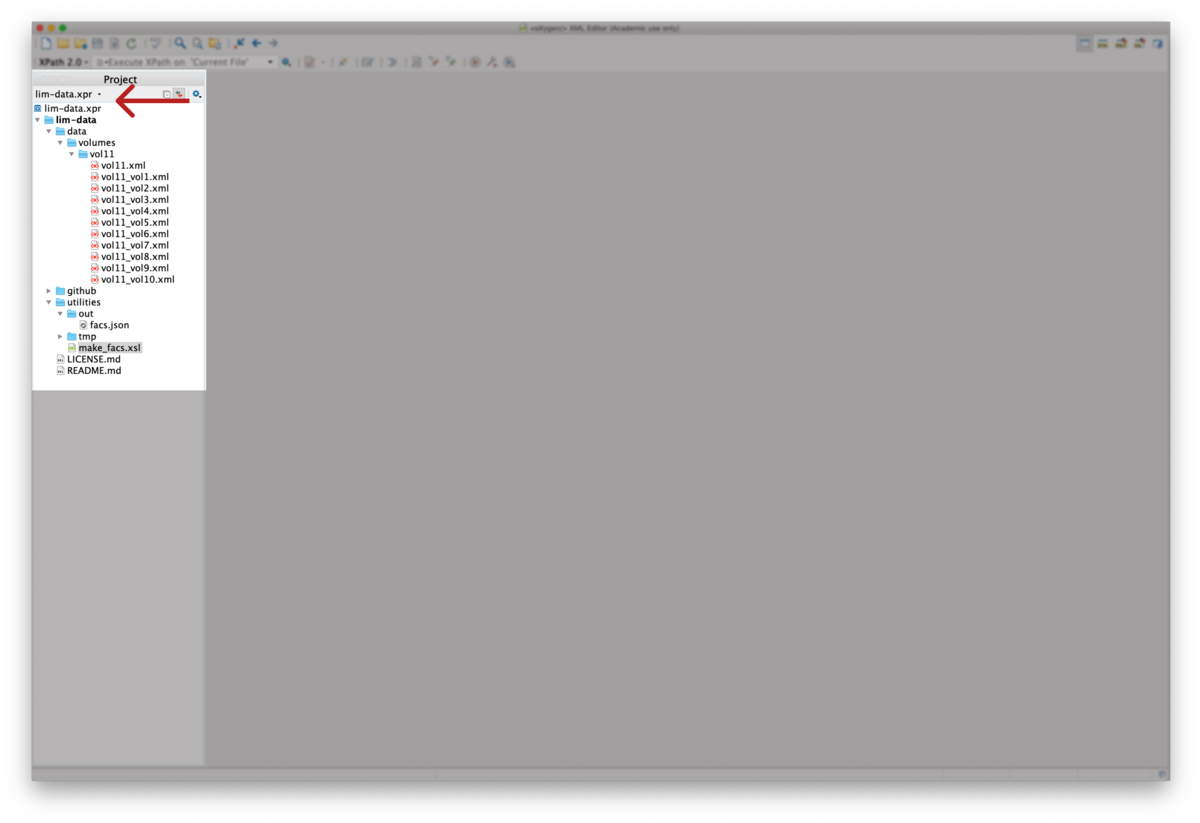
When you open oXygen, make sure you see the
lim-data.xpr
project in the oXygen project
pane (usually on the left-hand side):
Project pane
oXygen remembers the last project you opened, so it will usually
use the
lim-data
project file automatically.
If, for whatever reason, you are not in the
lim-data
project, make sure to open the
project file by going to
Project/Open Project
in the toolbar. You can use the Project pane to navigate through the
project files; all of the TEI files are in the
data/
folder.
As you edit your TEI file in oXygen, it is imperative that you
frequently and consistently validate your file. Invalidities in an
oXygen are signalled much like spell-check: the invalid element is
underlined in red and its location in the document is marked in the
scrollbar.
oXygen validates for you automatically as you type, but it might
lag (especially for large or complex documents), so it is best
practice to trigger validation manually as well, especially before
committing your changes.
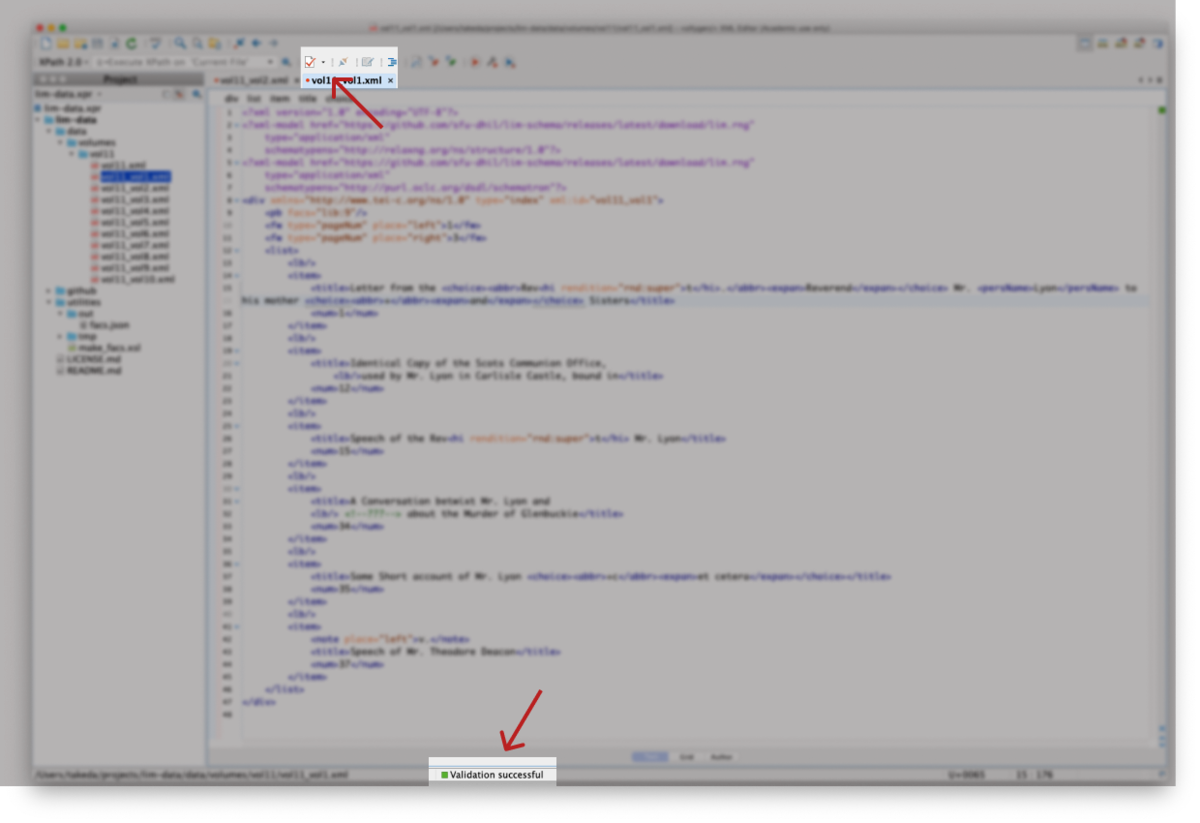
To validate your document, you can either use the keyboard
shortcut CMD+Shift+V (CMD = ⌘ on Mac) or click the red checkmark in
the toolbar:
Validate
Once the document finishes validating, there will be a message at
the bottom of the screen stating whether validation was successful.
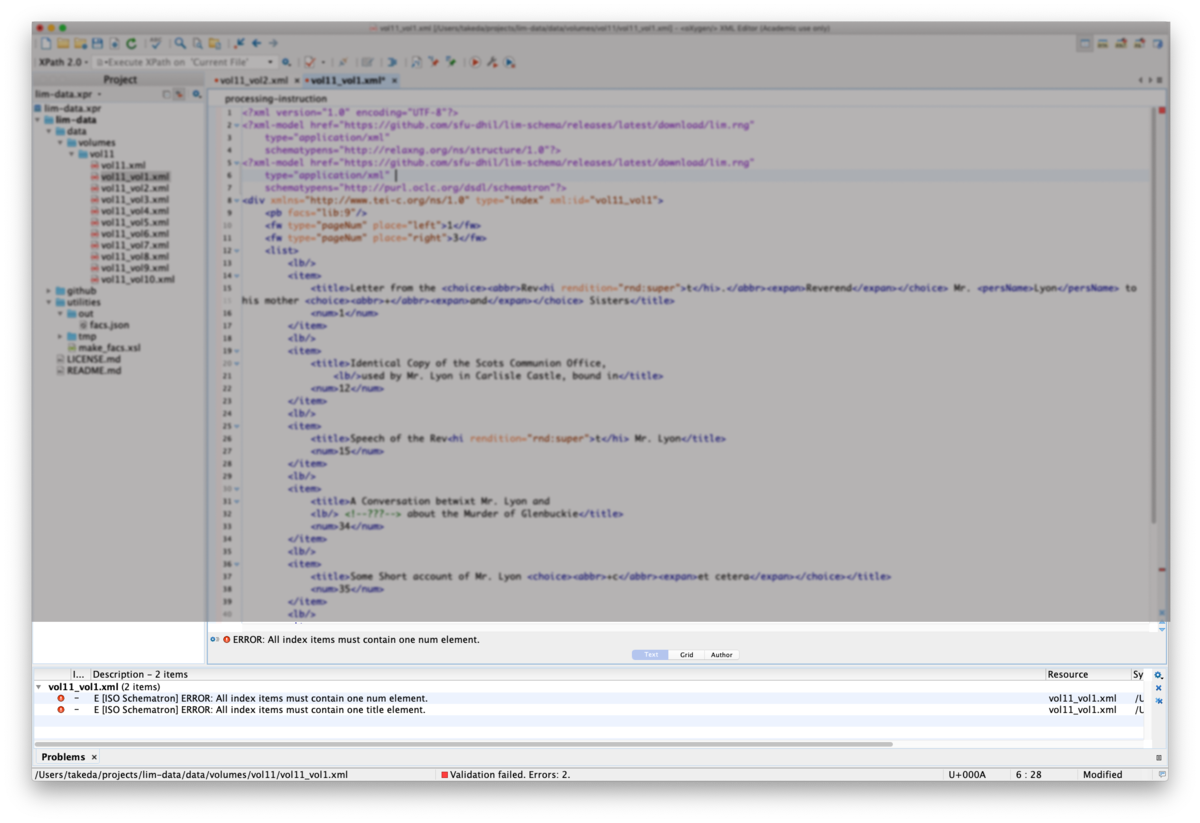
If there are errors in your document and validation fails, you will
see the red underlines and a info box at the bottom of the screen
that outlines the precise errors.
Validation errors
Try your best to determine what the error is: the validation
message usually provides a good indication of what the pfrom the
validation message (some are more helpful than others); the problem
is quite often something simple like a typo, an errant space at the
beginning or end of an element, or a missing quotation mark.
If you can't figure out the error, then it is OK to commit the
file, but do let the team and the developers know right away so that
the error can be resolved as soon as possible.
Committing Changes
After you've made a set of changes (i.e. before you take a break
or before the end of your work day) and confirmed that they were
valid, you need to commit those changes to the repository. To do
that, navigate to the "Git Staging" pane in oXygen (see
Getting Started for setting
up Git in oXygen)
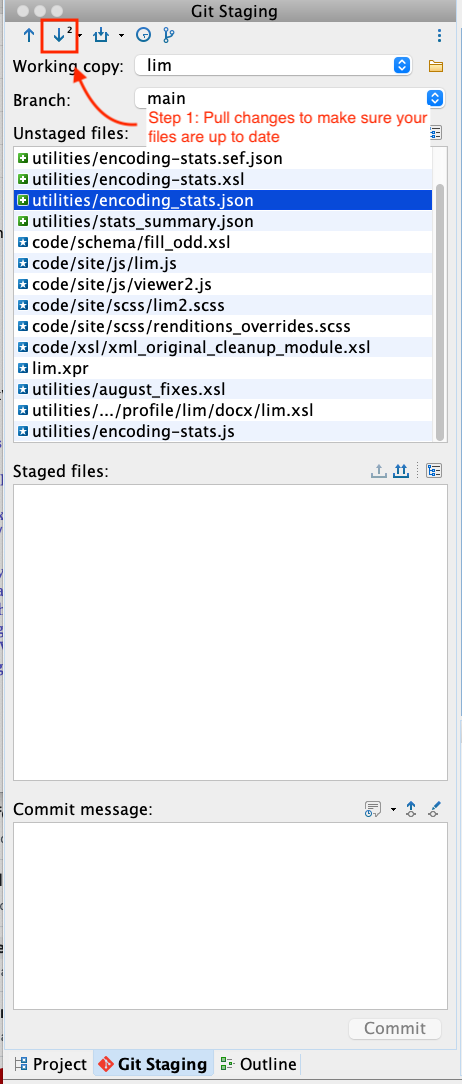
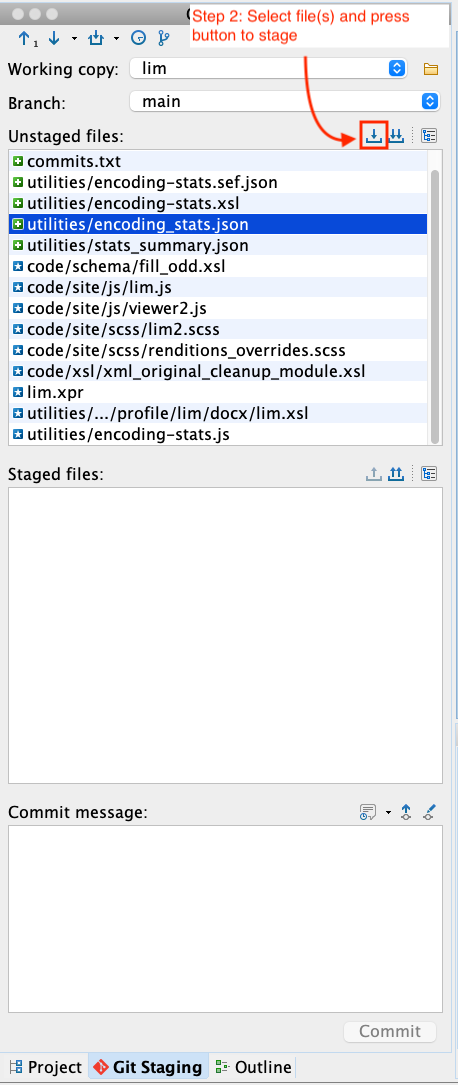
First, make sure you update your repository by pulling changes by
pressing the "Down" arrow:
Pull changes
It is a good idea to review those changes to make sure everything
looks right (i.e. all of the files that you actually changed are
listed; there are no additional changes). (You may see that the
lim-data.xpr
oXygen project file has changed
even though you didn't do anything to it—that's expected).
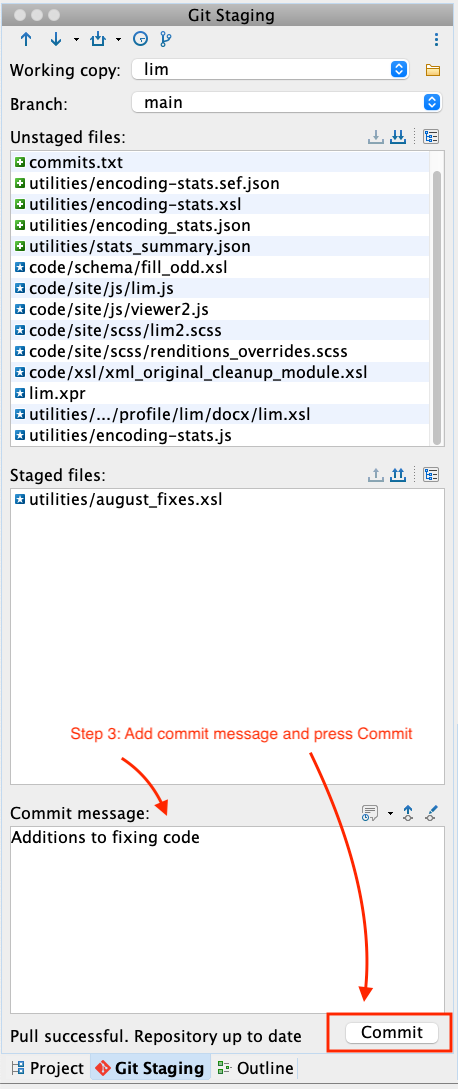
Assuming that everything looks correct, you can then commit those
files by selecting the files you want to commit and then pressing
the "Down" arrow.
Stage changes
Use the single down arrow if you only want to commit some files.
If you would like to commit all files, you can use the double down
arrow.
You must then commit the files by adding a commit message and
pressing "Commit".
These commit messages are helpful for record keeping and for
tracking changes to the files; note that these commit messages are
both permanent and public. In the
Commit
field, add a description of what you've done (i.e. "Added index
items for vol7").
Commit changes
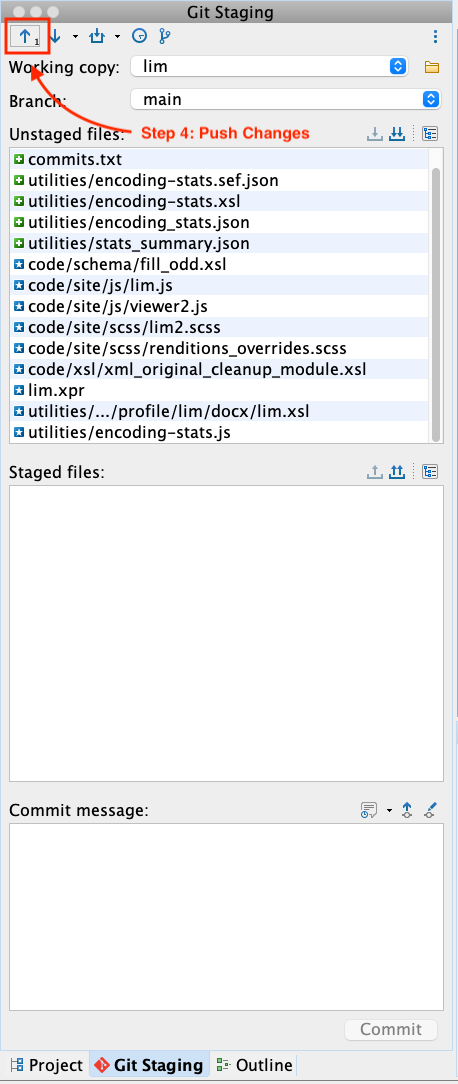
Finally, push the changes to the repository. This will mean that
everyone else will have an up-to-date copy of the files and will
trigger a new build of the website.
Push changes
Any changes you made to your files should be reflected on the
website within 10-15 minutes after you push. Be sure to check the
file and confirm that your changes are reflected on the site.
Creating new Contributor
To create a New Contributor, right click on the “contributors”
folder, and then select “New” and then “File”.
image10
Select the “templates” folder, and then click on “New Team
Member/ Contributor Document”. Change the file names to the author’s
initials (eg. SJI.xml).
image11
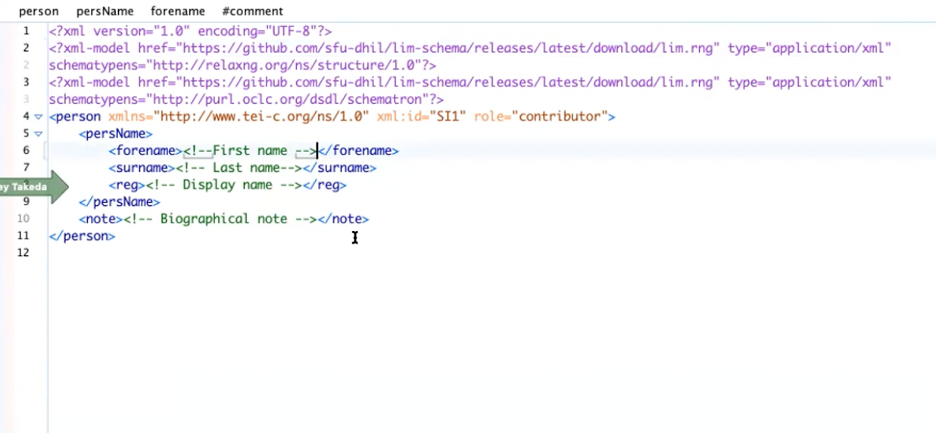
To edit a template, replace the green text (the XML Comment) with
your text. For instance, edit the forename, surname and display
name.
image12